Showing posts with label Trick. Show all posts

April 17, 2015

Wallpaper Enable-Disable Trick for Win XP

You can easily restricted someone to change wallpaper in Windows XP with following registry keys.


1. Restrict Wallpaper

Windows Registry Editor Version 5.00

[HKEY_CURRENT_USER\Software\Microsoft\Windows\CurrentVersion\Policies\ActiveDesktop]
"NoChangingWallPaper"=dword:00000001

2. Restore Wallpaper

Windows Registry Editor Version 5.00

[HKEY_CURRENT_USER\Software\Microsoft\Windows\CurrentVersion\Policies\ActiveDesktop]
"NoChangingWallPaper"=dword:00000000

November 01, 2008

Multi Window Google Talk

One year ago, I posted a trick on Muliti Window Yahoo Messenger. In that post, I described how to open multiple instance of Yahoo messenger on single computer system. In this post, I am going to explain how to create Multi Window Google Talk on signle machine. 

First, download Google Talk and install it. Now, just create a shortcut of Google Talk on desktop with help of right click. Make a right click on the icon of GTalk shortcut then select properties. You will get a new window as same as following. Now, go to shortcut tab of said window and find Target. Where you can see the following Target path of GTalk.

"C:\Program Files\Google\Google Talk\googletalk.exe"

Now, you just need to edit above Target path with few words or just copy following text and paste it in place of above Target line of GTalk shortcut. 

"C:\Program Files\Google\Google Talk\googletalk.exe" /nomutex

Once, you edited GTalk shortcut with above Target line it would be ready for multiple instance. Enjoy !!!

August 16, 2008

Folder Lock


Everybody really want to hide their data from others at office/home. I got lots questions regarding how to lock folder and make it private. I have seen so many same question on Yahoo! Answers too. There was a trick in Win 98 where you customized folder and locked but it was too old. Mostly all people use Windows XP and Windows Vista nowadays. There are many third party software like Folder Guard, Folder Lock, My Secret Folder etc available in market. They lock your personal folder and hide your data from others. But, you need full version of those third party software which does cost to you. Well, I found a cool trick to lock folder and hide your data without third party software. It is nothing but just a .bat (batch) file trick which creates a folder named 'Locker' on same directory when you open .bat file with following text in it. So, if you want to lock your data then open Notepad and type following text or copy|paste then save it with .bat file extension.
___________________________________________________
cls
@ECHO OFF
title Folder Locker
if EXIST "Control Panel.{21EC2020-3AEA-1069-A2DD-08002B30309D}" goto UNLOCK
if NOT EXIST Locker goto MDLOCKER
:CONFIRM
echo Are you sure you want to Lock the folder?(Y/N)
set/p "cho=>"
if %cho%==Y goto LOCK
if %cho%==y goto LOCK
if %cho%==n goto END
if %cho%==N goto END
echo Invalid choice.
goto CONFIRM
:LOCK
ren Locker "Control Panel.{21EC2020-3AEA-1069-A2DD-08002B30309D}"
attrib +h +s "Control Panel.{21EC2020-3AEA-1069-A2DD-08002B30309D}"
echo Folder locked
goto End
:UNLOCK
echo Enter password to Unlock folder
set/p "pass=>"
if NOT %pass%==YOUR PASSWORD HERE goto FAIL
attrib -h -s "Control Panel.{21EC2020-3AEA-1069-A2DD-08002B30309D}"
ren "Control Panel.{21EC2020-3AEA-1069-A2DD-08002B30309D}" Locker
echo Folder Unlocked successfully
goto End
:FAIL
echo Invalid password
goto end
:MDLOCKER
md Locker
echo Locker created successfully
goto End
:End
___________________________________________________

Don't forget to insert a password in place of text 'YOUR PASSWORD HERE'. Then simply run that .bat file. It will create a folder named 'Locker' on first run. (Please see following screen shot)


Once you get 'Locker' folder then save|copy-paste whatever you want to lock|hide from others. in 'Locker' folder. Now again make double click on .bat file. It pop ups a cmd window and ask you 'Are you sure you want to Lock the folder?(Y/N). Just input 'Y' and hit enter. It will lock|hide that 'Locker' folder with data in it. (Please see following screen shot)


Now, you want back your data from it. Just double click on .bat file again and it pop ups a cmd windows with command line 'Enter password to Unlock folder'. Just input your password which you typed in place of YOUR PASSWORD HERE'. It enables to see 'Locker' folder back and you can browse your data. (Please see following screen shot)


If you have trouble to type or copy|paste above coding text in Notepad then visit following link and download Folder Lock easily.

>>> Download Folder Locker here <<<

Advantages:
  • It is absolutely free
  • Just around less than 10 KB of size
  • It works with pen drive too
  • It works with Windows Vista too
Disadvantages:
  • Anyone can see when you enter a password
  • Not reliable like third party folder locker
  • It does not work with few system
Note: If you like posts here then please post your comments here.

August 03, 2008

Display Properties - Windows XP


I post answers on 
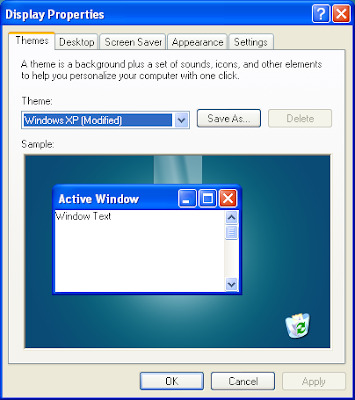
Yahoo! Answers regularly. Recently, I have seen few questions regarding Display properties of Windows XP. You can reach to Display Properties by right click on blank space on Desktop or go to start then click on Control Panel where you can get Display Properties. They asked about Display Properties, disable Screen Saver tab, disable Desktop tab etc. The system Administrator or some modified viruses/maleware are the reason of disable Display Properties and its features. You get following error message when your Display Properties disable by any reason(see screen shot).


It is nothing but just a registry trick. You can yourself make it enable or disable as per your requirements.

Enable Diplay Properties:
Type following text in notepad or copy-paste it and save it with .reg extension. Then simply run/merge it. It will Enable Display Properties.

Windows Registry Editor Version 5.00

[HKEY_CURRENT_USER\Software\Microsoft\Windows\CurrentVersion\Policies\system]
"NoDispCPL"=dword:00000000

[HKEY_LOCAL_MACHINE\Software\Microsoft\Windows\CurrentVersion\Policies\system]
"NoDispCPL"=dword:00000000


Disable Diplay Properties:

Type following text in notepad or copy-paste it and save it with .reg extension. Then simply run/merge it. It will Disable Display Properties.

Windows Registry Editor Version 5.00

[HKEY_CURRENT_USER\Software\Microsoft\Windows\CurrentVersion\Policies\system]
"NoDispCPL"=dword:00000001

[HKEY_LOCAL_MACHINE\Software\Microsoft\Windows\CurrentVersion\Policies\system]
"NoDispCPL"=dword:00000001


Enable Appearance tab:

Type following text in notepad or copy-paste it and save it with .reg extension. Then simply run/merge it. It will Enable Appearance (ie.Themes+Appearance) tab in Display Properties window.

Windows Registry Editor Version 5.00

[HKEY_CURRENT_USER\Software\Microsoft\Windows\CurrentVersion\Policies\system]
"NoDispAppearancePage"=dword:00000000

[HKEY_LOCAL_MACHINE\Software\Microsoft\Windows\CurrentVersion\Policies\system]
"NoDispAppearancePage"=dword:00000000


Disable Appearance tab:

Type following text in notepad or copy-paste it and save it with .reg extension. Then simply run/merge it. It will Disable Appearance (ie.Themes+Appearance) tab in Display Properties window.

Windows Registry Editor Version 5.00

[HKEY_CURRENT_USER\Software\Microsoft\Windows\CurrentVersion\Policies\system]
"NoDispAppearancePage"=dword:00000001

[HKEY_LOCAL_MACHINE\Software\Microsoft\Windows\CurrentVersion\Policies\system]
"NoDispAppearancePage"=dword:00000001


Enable Desktop tab:

Type following text in notepad or copy-paste it and save it with .reg extension. Then simply run/merge it. It will Enable Desktop tab in Display Properties window.

Windows Registry Editor Version 5.00

[HKEY_CURRENT_USER\Software\Microsoft\Windows\CurrentVersion\Policies\system]
"NoDispBackgroundPage"=dword:00000000

[HKEY_LOCAL_MACHINE\Software\Microsoft\Windows\CurrentVersion\Policies\system]
"NoDispBackgroundPage"=dword:00000000


Disble Desktop tab:
Type following text in notepad or copy-paste it and save it with .reg extension. Then simply run/merge it. It will Disable Desktop tab in Display Properties window.

Windows Registry Editor Version 5.00

[HKEY_CURRENT_USER\Software\Microsoft\Windows\CurrentVersion\Policies\system]
"NoDispBackgroundPage"=dword:00000001

[HKEY_LOCAL_MACHINE\Software\Microsoft\Windows\CurrentVersion\Policies\system]
"NoDispBackgroundPage"=dword:00000001


Enable Screen Saver tab:

Type following text in notepad or copy-paste it and save it with .reg extension. Then simply run/merge it. It will Enable Screen Saver tab in Display Properties window.

Windows Registry Editor Version 5.00

[HKEY_CURRENT_USER\Software\Microsoft\Windows\CurrentVersion\Policies\system]
"NoDispScrSavPage"=dword:00000000

[HKEY_LOCAL_MACHINE\Software\Microsoft\Windows\CurrentVersion\Policies\system]
"NoDispScrSavPage"=dword:00000000


Disable Screen Saver tab:
Type following text in notepad or copy-paste it and save it with .reg extension. Then simply run/merge it. It will Disable Screen Saver tab in Display Properties window.

Windows Registry Editor Version 5.00

[HKEY_CURRENT_USER\Software\Microsoft\Windows\CurrentVersion\Policies\system]
"NoDispScrSavPage"=dword:00000001

[HKEY_LOCAL_MACHINE\Software\Microsoft\Windows\CurrentVersion\Policies\system]
"NoDispScrSavPage"=dword:00000001


Enable Settings tab:

Type following text in notepad or copy-paste it and save it with .reg extension. Then simply run/merge it. It will Enable Settings tab in Display Properties window.

Windows Registry Editor Version 5.00

[HKEY_CURRENT_USER\Software\Microsoft\Windows\CurrentVersion\Policies\system]
"NoDispSettingsPage"=dword:00000000

[HKEY_LOCAL_MACHINE\Software\Microsoft\Windows\CurrentVersion\Policies\system]
"NoDispSettingsPage"=dword:00000000


Disble Settings tab:
Type following text in notepad or copy-paste it and save it with .reg extension. Then simply run/merge it. It will Disable Settings tab in Display Properties window.

Windows Registry Editor Version 5.00

[HKEY_CURRENT_USER\Software\Microsoft\Windows\CurrentVersion\Policies\system]
"NoDispSettingsPage"=dword:00000001

[HKEY_LOCAL_MACHINE\Software\Microsoft\Windows\CurrentVersion\Policies\system]
"NoDispSettingsPage"=dword:00000001


.

July 25, 2008

Restore Recycle Bin


I posted an article on Recycle Bin-Windows XP on dated 20th November, 2007. People appreciated this article but they asked me how to enable/disable Recycle Bin in Windows XP. I got question regarding Restore disabled Recycle Bin in Windows XP. I forgot to write on this issue. Now, here I am for how to Restore Recycle Bin in Windows XP.

As usual it is just Registry trick. You can do yourself with following details.


Recycle Bin Enable:
Type following text in notepad or copy-paste it. Then run/merge it. It will Enable Recycle Bin.

Windows Registry Editor Version 5.00

[HKEY_CURRENT_USER\Software\Microsoft\Windows\CurrentVersion\Explorer\HideDesktopIcons\NewStartPanel]
"{645FF040-5081-101B-9F08-00AA002F954E}"=dword:00000000


Recycle Bin Disable:
Type following text in notepad or copy-paste it. Then run/merge it. It will Disable Recycle Bin.

Windows Registry Editor Version 5.00

[HKEY_CURRENT_USER\Software\Microsoft\Windows\CurrentVersion\Explorer\HideDesktopIcons\NewStartPanel]
"{645FF040-5081-101B-9F08-00AA002F954E}"=dword:00000001


Note: This trick works with Windows Vista too. Please try this one with Windows Vista.
.

June 08, 2008

Add-Remove Programs Enable-Disable


Add or Remove Programs is the most important options for computer system. You can reach it through Start>Settings>Control Panel or Start>Run>type 'appwiz.cpl'. It has following inbuilt options.

(1) Change or Remove Programs
(2) Add New Programs
(3) Add/Remove Windows Components


The system Administrators may disable it for security reason like whole Control Panel. Few malicious software are also capable to edit Registry and make Add or Remove Programs disable which displays following error message(check screen shot).


You can also Enable/Disable the Add or Remove Programs in Control Panel settings with following steps.

Disable Add or Remove Programs:
Type following text in notepad or copy-paste it and run/merge it. It will Disable Control Panel.

Windows Registry Editor Version 5.00

[HKEY_CURRENT_USER\SOFTWARE\Microsoft\Windows\ CurrentVersion\policies\Uninstall]
"NoAddRemovePrograms"=dword:00000001


[HKEY_LOCAL_MACHINE\SOFTWARE\Microsoft\Windows\ CurrentVersion\policies\Uninstall]
"NoAddRemovePrograms"=dword:00000001


Enable Add or Remove Programs:
Type following text in notepad or copy-paste it and run/merge it. It will Enable Control Panel.

Windows Registry Editor Version 5.00

[HKEY_CURRENT_USER\SOFTWARE\Microsoft\Windows\ CurrentVersion\policies\Uninstall]
"NoAddRemovePrograms"=
dword:00000000

[HKEY_LOCAL_MACHINE\SOFTWARE\Microsoft\Windows\ CurrentVersion\policies\Uninstall]
"NoAddRemovePrograms"=dword:00000000

May 15, 2008

Yahoo Messenger Ad Killer

There are so many people use Yahoo messenger with chat rooms. Mostly people go to Yahoo chat rooms and find chat buddy. But more boring part is Ad which stay at bottom part of chat rooms' windows. Please see following screen shot. I found its nothing just registry settings in your system which allow Yahoo chat rooms to display Ad. Even you can edit/modify it with Registry Editor.

(1) No Add or Blank:
If you don't want any Ad on Yahoo chat rooms then just download following ready to use registry merger file and install it on your system.


(2) My Blog Ad:
If you want to display my website's URL on Yahoo chat rooms then just download following ready to use registry merger file and install it on your system.


(3) Restore Default:
If you want to restore default settings as it was then just download following ready to use registry merger file and install it on your system.

April 13, 2008

Update anti virus without Internet


I got lots of questions regarding "Update anti virus software without having Internet". So many people asked me on this point. Finally, I found a solution which works with AVG anti virus.

Mostly people work with Internet equipped computer system at office and they also have computer at home too. Some of them don't have Internet connection at home and some of them don't want to cross download/upload limit of their tariff plan of Internet connection at home. That is why they want to update anti virus at office and want to update anti virus at home without using Internet. I am going to describe how it is possible with AVG anti virus software. It is little tricky but not so hard. So, are you ready?!!!

First, you have to remember that you must install AVG anti virus with same .exe file at office and home. Please update AVG anti virus software on your office computer system with latest signature available.

STEP(1)
Now, go to 'C:\Program Files\Grisoft\AVG7' and select entire files except 'avgse.dll' file then copy all files from your office computer system which you updated(see following scree shot). Create a new folder on removable storage media(Pen Drive, CDs, etc) and paste all files (excluding 'avgse.dll').


STEP(2)
Start your home computer and wait to load all services. Press Ctrl+Alt+Del and call Windows Task Manager. Go to Process tab of Task Manager and Kill/End following AVG services(see screen shot).
  • avgcc.exe
  • avgemc.exe
  • avgupsvc.exe
  • avgamsvr.exe
Now insert your removable storage media and open that folder where you pasted latest signature of AVG from office computer system. Copy entire files with latest signature from your removable storage media. Paste all those copied files in to 'C:\Program Files\Grisoft\AVG7' which will be updated your AVG at home computer without having Internet connection. Please Restart your computer. I am sure it works!!!


Disclaimer: Please use this trick at your own risk only.

February 04, 2008

Legal Notice Caption - Windows

This is a good trick which runs before logon to Windows. It works with all Windows. It displays a message window before logon. You can yourself create a Legal Caption for your computer system. Go to Start-> Run command. Then open Registry Editor with help of 'regedit'.

Find the appropriate key for your operating system.

Windows 95, 98 and Me:
HKEY_LOCAL_MACHINE\SOFTWARE\Microsoft\ Windows\CurrentVersion\Winlogon

Windows NT, 2000 and XP:
HKEY_LOCAL_MACHINE\SOFTWARE\Microsoft\ WindowsNT\CurrentVersion\Winlogon

Create/modify a string value(REG_SZ) named 'LegalNoticeCaption' and type the text you want to appear in the legal notice windows title bar. (e.g. 'CAUTION')


Create/modify a string value(REG_SZ) named 'LegalNoticeText' and type the text you want to appear as message body. (e.g. 'THIS COMPUTER BELONGS TO MR. XYZ')


Restart your computer and you will get to see a Legal Notice dialog box window before logon to Windows. Please refer real screen shots for help.

December 26, 2007

Taskbar - Windows


It is the bar which is located on bottom of the Desktop screen. It is used to launch and monitor applications in Microsoft Windows. It contains Start menu, Quick Launch bar, System Tray, Display Running Tasks, etc. You can modify Taskbar as per your requirement.


I got a call for trouble regarding Taskbar. That machine didn't display running tasks in Taskbar area. I found that machine infected from viruses/worms. The viruses/worms might be edited that machine's Registry and made running tasks disable/hidden. I tried a lot to make it default. But, it didn't work. Ultimately, I found a .vbs script for same trouble. I downloaded that script and run it. It solved trouble and that machine's Taskbar worked normal as it before. You can download this magical script from following link.


If you don't able to download said script then just email me. I will send this script to you.

December 03, 2007

Internet Options - Enable/Disable


Suppose you work at a place where you share your computer with others. They don't know much more about computer /Internet and every time they change IE's Internet settings which is best for in use. You can stop anyone to alter Internet settings by disable Internet Options under Tools menu. It is quite easy trick. As usual, you just need modify Registry.

Internet Options - Disable:
Type following text in notepad or copy-paste it and run/merge it. It will Disable Internet Options.

Windows Registry Editor Version 5.00

[HKEY_CURRENT_USER\Software\Policies\Microsoft\Internet Explorer\Restrictions]
"NoBrowserOptions"=dword:00000001

[HKEY_LOCAL_MACHINE\SOFTWARE\Policies\Microsoft\Internet Explorer\Restrictions]
"NoBrowserOptions"=dword:00000001


Internet Options - Enable:
Type following text in notepad or copy-paste it and run/merge it. It will Enable Internet Options.

Windows Registry Editor Version 5.00

[HKEY_CURRENT_USER\Software\Policies\Microsoft\Internet Explorer\Restrictions]
"NoBrowserOptions"=dword:00000000

[HKEY_LOCAL_MACHINE\SOFTWARE\Policies\Microsoft\Internet Explorer\Restrictions]
"NoBrowserOptions"=dword:00000000

>>> Download IE Enable Registry File here <<<

Note: This trick works with Windows Vista too. Please try to compatibility.
.

November 22, 2007

Email Forging - Fun Mailer(Return)


I have posted an article on titled "Email Forging-Fun Mailer" on date September 30, 2007. It was great but bad trick so they removed it due to violation of T.O.S. But, it returns again. Just click on following link and send email to anyone with using anyone's email address.


Disclaimer: Remember it is just for fun and educational purpose. Please don't use anything for malicious purpose. Use this trick at your own risk only. I am not liable for anything.

November 21, 2007

Bootskin Trick

This is a good trick to fool your friend/colleague. It is regarding display a Boot Screen whick looks like 'Hard Disk Formating' alert. So, it will fool easily. You just need to install Bootskin software which is absolutely free from its site-> http://www.stardock.com/products/bootskin/ Please refer following real screen shot of this software.


Then you need to download 'Formating Boot Screen' from same site and install it with help of above said software-> http://www.wincustomize.com/skins.aspx?skinid=1292&libid=32 So, when your friend or colleague will restart his/her system then he/she will find that his/her computer's hard drive is being formatted. Only you know that it is a Trick/Prank. I am sure he/she will shocked and try to restart his/her machine again and again. But it won't stop display that Boot Screen until remove it. As per Boot Screen help, you will not stop previewing it until you click on its window anywhere. But, I have found that it doesn't work to click on its window and stop previewing it. So, I have used 'Safe Mode' and remove it. Please refer real screen shot of said 'Formating Boot Screen'.


Disclaimer: This is complicated trick so please be careful while using it. I am not liable for anything happen to your computer.

November 20, 2007

Recycle Bin - Windows XP


I have noticed that people don't really know more about Recycle Bin. Recycle Bin has few good facility. You can configure it as per your need. I have described them here. Make right click on Recycle Bin and reach to properties. You will get a window.

(1) From this option you can set space/size of deleted files on your Hard Disk. You can set up single settings for all Drives ( all partitions ) or you can set it up independent settings for each partition. (Check Arrow No:1)

(2) If you are skilled person in computer then you can enable this settings. It doesn't move files to Recycle Bin. It deletes them directly. It is harmful if you don't sure whether you want to delete or not. (Check Arrow No:2)

(3) When you delete file/s from your computer you will get delete confirmation dialog box. It is sometimes boring to always hit 'Yes' button on this dialog box. So, if you can set up this option it will never display delete confirmation box. It will delete and move your file/s quick to Recycle Bin. (Check Arrow No:3)

Please check following real screen shot of above explained options.


November 10, 2007

EXE File Transfer via Email

Sometimes we faced problem sending EXE files via Email. Mostly all Email clients have banned to send(transfer) EXE file via their mail server due to security reasons. I appreciate this banned because of no one send any harmful EXE via Email. But, it also prevents us to send important EXE files via Email. So, I used this trick to send EXE via Email. This is very easy trick to send an EXE via any Email clients. You can send any EXE file via Email just in following easy steps. You just need to change any EXE files extension ".exe" to ".ex" or anything as unknown in computing language. Please refer following picture.


October 21, 2007

OEM Information


When you make right click on My Computer icon and hit properties then you will find company's Logo and Useful information on My Computer's General Tab. Every computer manufacturing company provide this kind of information for customer support and service. You can yourself edit, modify, or create this kind of details called OEM info. For it you just need to create following 2 files in C:\WINDOWS\system32

(1) OEMLOGO.BMP: It is Bitmap(.bmp) picture file which size is 182 x 115 pixels
(2) OEMINFO.INI: Just create a text file in notepad and write following lines and save it with .ini extension with name OEMINFO

[General]
Manufacturer=
Model=
[Support Information]
Line1=" "
Line2=" "
Line3=" "


September 30, 2007

Email Forging - Fun Mailer

All Email communication on the Internet is governed by rules and regulations laid by 2 different protocols:
(1) Simple Mail Transfer Protocol (SMTP)
(2) Post Office Protocol (POP)

Email is widely use Internet features. So, anyone uses it for malicious purpose with variety basis like:
(1) Abusive Email
(2) Email Forging
(3) Spam Email

Out of above, Email Forging is widely use for malicious purpose. It allows anyone to disguise the source of an Email and send it to the victim. It is the art of sending an Email from the victim's Email account without knowing the password.

For example: If you know your friend's Email ID then you can Email and inform his girl friend that he hates her and will break up them relationship. Or, If you know your Principle's Email ID then you can Email and inform your entire college that it will be holiday on tomorrow. Or, If you know your Boss/CEO's Email ID then you can Email on behalf of your CEO and inform entire office staff whatever you want. (all these are malicious activities so I myself don't allow)

But you can use it for Fun and just fool your friend using this tricks. Just fill out following Form and send Email. (I am not liable for anything so be careful while using this trick)


September 29, 2007

Change Caption of Internet Explorer

Some cyber cafes or companies use this kind of settings/trick like "Microsoft Internet Explorer by {company name}" or anything whatever they want to display on Internet Explorer's Title Bar. You can also change Caption of Internet Explorer. From this trick, you can create your own caption of Internet Explorer as per following simple steps.

Default Caption:


Change Caption:
You just need to add a String Value named "Window Title"(without quotation) under following registry branches;

HKEY_CURRENT_USER\Software\Microsoft\Internet Explorer\Main
HKEY_LOCAL_MACHINE\SOFTWARE\Microsoft\Internet Explorer\Main

After creating "Window Title" string, type whatever you want to display as its value.

OR

Open notepad and copy-paste following text then save it as .reg extension. After then, simply run/merge it.

Windows Registry Editor Version 5.00

[HKEY_CURRENT_USER\Software\Microsoft\Internet Explorer\Main]
"Window Title"="Microsoft Internet Explorer by ASHISH JANSARI"

[HKEY_LOCAL_MACHINE\SOFTWARE\Microsoft\Internet Explorer\Main]
"Window Title"="Microsoft Internet Explorer by ASHISH JANSARI"

Note: Please don't forget to replace text as per your caption in place of "Microsoft Internet Explorer by ASHISH JANSARI".


September 22, 2007

Free POP3 Yahoo! Mail


It is not easy all time to open Internet, log in and check email. You can get emails through POP3 service and it is so easy to check emails via Outlook or Outlook Express. But, there is a condition that your email client offer this kind of service then you can enable it on your home/office computer with few settings. Mostly we are all using Yahoo! mail. Yahoo! mail don't offer this kind of facility with .com, .co.in etc. But, there is a trick from where you make Yahoo! Mail account and get free POP3 facility. Just open an account on Yahoo! Mail-UK & Ireland and get free POP3 facility.

Once you got an account on Yahoo! Mail-UK & Ireland then go to mail options click on 'POP Access and Forwarding'. Then select 'Web and POP Access'. Once you enabled this option you can get mails from Outlook or Outlook Express. Please refer following real screen shots.


After done above task now you just need to configure Outlook or Outlook Express with following settings.

Incoming Mail Server (POP3): pop.mail.yahoo.co.uk(Port: 995)


Outgoing Mail Server (SMTP): smtp.mail.yahoo.co.uk (Port: 465)


September 19, 2007

Auto Image Resize in Internet Explorer

Sometimes, we really don't know little but useful option. Auto Image Resize is just like that. One of my colleague complaint me that his Internet Explorer doesn't set image size automatically. When he browses with maximize window of Internet Explorer then it is fine with image size but when he Restore Internet Explorer then the image size doesn't set/follow to Internet Explorer. If you can enable Auto Image Resize in Internet Explorer then image size always follow to your Internet Explorer window size. Mostly, it is enable. But if it is disable then you can enable it with simple following steps.

Copy-paste following text in notepad and save it with .reg extension, then just merge/run it.

Windows Registry Editor Version 5.00

[HKEY_CURRENT_USER\Software\Microsoft\Internet Explorer\Main]
"Enable AutoImageResize"="yes"


Enable Auto Image Resize:


Disable Auto Image Resize: