November 13, 2008

Defragment on Right Click


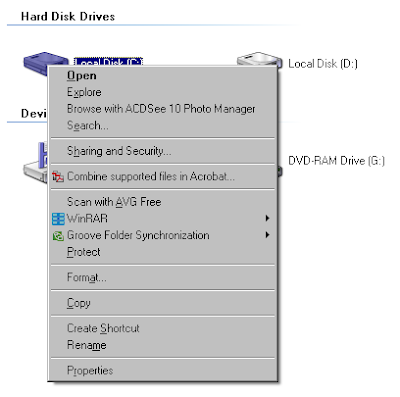
I posted lots of tricks on registry. This is another one. If you want to add Defragment option on your context menu then just use this trick. "The process or reorganizing and rewriting files so that they occupy one large continuous area on your hard disk rather than several smaller areas its called Defragmentation." You can also add Defragment on right click of mouse with help of following simple steps.


Add Defragmant:
Type following text in notepad or copy-paste it and save it with .reg extension. Then simply run/merge it. It will add Defragment option on right click of mouse.

Windows Registry Editor Version 5.00

[HKEY_CLASSES_ROOT\Drive\shell\runas]@="Defragment"
[HKEY_CLASSES_ROOT\Drive\shell\runas\command]@="defrag %1 -v"


Remove Defragmnet:
Type following text in notepad or copy-paste it and save it with .reg extension. Then simply run/merge it. It will remove Defragment option on right click of mouse.

Windows Registry Editor Version 5.00

[-HKEY_CLASSES_ROOT\Drive\shell\runas]

November 01, 2008

Multi Window Google Talk

One year ago, I posted a trick on Muliti Window Yahoo Messenger. In that post, I described how to open multiple instance of Yahoo messenger on single computer system. In this post, I am going to explain how to create Multi Window Google Talk on signle machine. 

First, download Google Talk and install it. Now, just create a shortcut of Google Talk on desktop with help of right click. Make a right click on the icon of GTalk shortcut then select properties. You will get a new window as same as following. Now, go to shortcut tab of said window and find Target. Where you can see the following Target path of GTalk.

"C:\Program Files\Google\Google Talk\googletalk.exe"

Now, you just need to edit above Target path with few words or just copy following text and paste it in place of above Target line of GTalk shortcut. 

"C:\Program Files\Google\Google Talk\googletalk.exe" /nomutex

Once, you edited GTalk shortcut with above Target line it would be ready for multiple instance. Enjoy !!!

September 29, 2008

MS Office Save as PDF


Sometimes, we do really miss important add on facility on basic software. As well, there is a Save as PDF option introduced by Microsoft Corporation for Microsoft Office 2007 Programs. This is really a cool add on by Microsoft Corporation. You just need to download a 'Save as PDF' tool from following link.


You will get save as pdf option in save as type after installed above add on. This allows you to export and save to PDF (Portable Document Format) format of any programs of MS Office 2007 set. You can convert MS Word or Excel files in PDF with this tool so easily.


.

September 13, 2008

NTLDR Trouble

I handled an issue regarding NTLDR missing error on system boot up. The NTLDR is boot loader for Microsoft Windows (specially NT based operating system) and known NT Loder. The NTLDR runs from Primary HDD, USB Drive, CD-ROM too. It is booting system file so once its corrupted then it won't let you load/boot your operating system. Please check some reasons to corrupt NTLDR.
  • Boot priority/sequence changed
  • Due to up gradation of operating system
  • Due to virus/malware
  • Install any lower version of Windows on pre-installed higher version Windows (dual booting operating system)
One of NTLDR's error is shown below(please see screen shot). It says "NTLDR is missing.. Press Ctrl+Alt+Del to restart."


I tried following solution on few machines and got success. I hope it will help you too. You just need bootable Windows 98 CD and Windows XP CD. First, change boot priority from Hard Disk to CD ROM. Then, insert Windows 98 CD and get command propmt. Just leave as it is and open CD ROM while command propmt. Remove Windows 98 CD and insert Windows XP CD. Now, you just need to copy 2 files from Windows XP CD to your Primary Hard Disk (i.e. C: ). You can use following command lines to copy files. Suppose your main primary partition drive letter is C: and CD ROM drive letter is E:

  • E:\> copy E:\i386\ntldr C:\
  • E:\> copy E:\i386\ntdetect.com C:\
Please change boot priority device before restart your system. I hope this will work. Best of Luck!!!

:)

September 01, 2008

WMS Idle Error on Shutdown

I got a call regarding an error which arrived when they did shutdown their computer. It was WMS Idle error which appeared on Windows shutdown. They did hit end process to shutdown their computer. It wasn't harmful but no one likes this kind of interruption. Well, it was nothing but related with 'nmbgmonitor' which referred to Nero Application. The Nero installed on their computer and it was running while they did shut their computer off. That is was they got an error.

I suggested them to go to start then open run and type msconfig.msc. Its nothing but System Configuration Utility. Please see following screen shot of msconfig.msc.


I told them to kill service named 'NMBGMonitor' under 'Startup' tab of msconfig.msc. Once they made changes the WMS Idle error haven't seen back again. Please see following screen shot.

.

August 16, 2008

Folder Lock


Everybody really want to hide their data from others at office/home. I got lots questions regarding how to lock folder and make it private. I have seen so many same question on Yahoo! Answers too. There was a trick in Win 98 where you customized folder and locked but it was too old. Mostly all people use Windows XP and Windows Vista nowadays. There are many third party software like Folder Guard, Folder Lock, My Secret Folder etc available in market. They lock your personal folder and hide your data from others. But, you need full version of those third party software which does cost to you. Well, I found a cool trick to lock folder and hide your data without third party software. It is nothing but just a .bat (batch) file trick which creates a folder named 'Locker' on same directory when you open .bat file with following text in it. So, if you want to lock your data then open Notepad and type following text or copy|paste then save it with .bat file extension.
___________________________________________________
cls
@ECHO OFF
title Folder Locker
if EXIST "Control Panel.{21EC2020-3AEA-1069-A2DD-08002B30309D}" goto UNLOCK
if NOT EXIST Locker goto MDLOCKER
:CONFIRM
echo Are you sure you want to Lock the folder?(Y/N)
set/p "cho=>"
if %cho%==Y goto LOCK
if %cho%==y goto LOCK
if %cho%==n goto END
if %cho%==N goto END
echo Invalid choice.
goto CONFIRM
:LOCK
ren Locker "Control Panel.{21EC2020-3AEA-1069-A2DD-08002B30309D}"
attrib +h +s "Control Panel.{21EC2020-3AEA-1069-A2DD-08002B30309D}"
echo Folder locked
goto End
:UNLOCK
echo Enter password to Unlock folder
set/p "pass=>"
if NOT %pass%==YOUR PASSWORD HERE goto FAIL
attrib -h -s "Control Panel.{21EC2020-3AEA-1069-A2DD-08002B30309D}"
ren "Control Panel.{21EC2020-3AEA-1069-A2DD-08002B30309D}" Locker
echo Folder Unlocked successfully
goto End
:FAIL
echo Invalid password
goto end
:MDLOCKER
md Locker
echo Locker created successfully
goto End
:End
___________________________________________________

Don't forget to insert a password in place of text 'YOUR PASSWORD HERE'. Then simply run that .bat file. It will create a folder named 'Locker' on first run. (Please see following screen shot)


Once you get 'Locker' folder then save|copy-paste whatever you want to lock|hide from others. in 'Locker' folder. Now again make double click on .bat file. It pop ups a cmd window and ask you 'Are you sure you want to Lock the folder?(Y/N). Just input 'Y' and hit enter. It will lock|hide that 'Locker' folder with data in it. (Please see following screen shot)


Now, you want back your data from it. Just double click on .bat file again and it pop ups a cmd windows with command line 'Enter password to Unlock folder'. Just input your password which you typed in place of YOUR PASSWORD HERE'. It enables to see 'Locker' folder back and you can browse your data. (Please see following screen shot)


If you have trouble to type or copy|paste above coding text in Notepad then visit following link and download Folder Lock easily.

>>> Download Folder Locker here <<<

Advantages:
  • It is absolutely free
  • Just around less than 10 KB of size
  • It works with pen drive too
  • It works with Windows Vista too
Disadvantages:
  • Anyone can see when you enter a password
  • Not reliable like third party folder locker
  • It does not work with few system
Note: If you like posts here then please post your comments here.

August 10, 2008

Microsoft Office Outlook - Backup


Someone asked me about backup of Microsoft Office Outlook before few months ago. Their email account configured with Microsoft Office Outlook. So, each and every emails travel through Microsoft Office Outlook. The entire important emails and other relative data stored on hard disk. One day their Windows crashed and lost entire important emails including contacts details too. That is why they asked me about backup of Microsoft Office Outlook.


I found that Microsoft Corporation introduced Backup utility with Microsoft Office Outlook which is not so popular with Microsoft Office Outlook. This Backup utility works with following outlook client.
  1. Microsoft Outlook 2002
  2. Microsoft Office Outlook 2003
  3. Microsoft Office Outlook 2007
It is just 160 KB size of tool named 'pfbackup.exe'. It is absolutely free tool. You just need to run/install it then you get 'Backup' options under File menu of your Outlook. You can backup of your outlook as per your requirements. It creates backup in .pst file format(Personal folder files). You can store it on another partition or external removable storage media like Pen Drive, USB Hard Disk, CDs etc. Please visit following link to download backup tools.


It is easy to get backup of stored .pst file from your storage media. You just need to use Import and Export options under File menu of Microsoft Office Outlook. To learn more please visit following link of Microsoft Corporation.

Using the Microsoft Outlook Personal Folders Backup tool

.

August 03, 2008

Display Properties - Windows XP


I post answers on Yahoo! Answers regularly. Recently, I have seen few questions regarding Display properties of Windows XP. You can reach to Display Properties by right click on blank space on Desktop or go to start then click on Control Panel where you can get Display Properties. They asked about Display Properties, disable Screen Saver tab, disable Desktop tab etc. The system Administrator or some modified viruses/maleware are the reason of disable Display Properties and its features. You get following error message when your Display Properties disable by any reason(see screen shot).


It is nothing but just a registry trick. You can yourself make it enable or disable as per your requirements.

Enable Diplay Properties:
Type following text in notepad or copy-paste it and save it with .reg extension. Then simply run/merge it. It will Enable Display Properties.

Windows Registry Editor Version 5.00

[HKEY_CURRENT_USER\Software\Microsoft\Windows\CurrentVersion\Policies\system]
"NoDispCPL"=dword:00000000

[HKEY_LOCAL_MACHINE\Software\Microsoft\Windows\CurrentVersion\Policies\system]
"NoDispCPL"=dword:00000000


Disable Diplay Properties:

Type following text in notepad or copy-paste it and save it with .reg extension. Then simply run/merge it. It will Disable Display Properties.

Windows Registry Editor Version 5.00

[HKEY_CURRENT_USER\Software\Microsoft\Windows\CurrentVersion\Policies\system]
"NoDispCPL"=dword:00000001

[HKEY_LOCAL_MACHINE\Software\Microsoft\Windows\CurrentVersion\Policies\system]
"NoDispCPL"=dword:00000001


Enable Appearance tab:

Type following text in notepad or copy-paste it and save it with .reg extension. Then simply run/merge it. It will Enable Appearance (ie.Themes+Appearance) tab in Display Properties window.

Windows Registry Editor Version 5.00

[HKEY_CURRENT_USER\Software\Microsoft\Windows\CurrentVersion\Policies\system]
"NoDispAppearancePage"=dword:00000000

[HKEY_LOCAL_MACHINE\Software\Microsoft\Windows\CurrentVersion\Policies\system]
"NoDispAppearancePage"=dword:00000000


Disable Appearance tab:

Type following text in notepad or copy-paste it and save it with .reg extension. Then simply run/merge it. It will Disable Appearance (ie.Themes+Appearance) tab in Display Properties window.

Windows Registry Editor Version 5.00

[HKEY_CURRENT_USER\Software\Microsoft\Windows\CurrentVersion\Policies\system]
"NoDispAppearancePage"=dword:00000001

[HKEY_LOCAL_MACHINE\Software\Microsoft\Windows\CurrentVersion\Policies\system]
"NoDispAppearancePage"=dword:00000001


Enable Desktop tab:

Type following text in notepad or copy-paste it and save it with .reg extension. Then simply run/merge it. It will Enable Desktop tab in Display Properties window.

Windows Registry Editor Version 5.00

[HKEY_CURRENT_USER\Software\Microsoft\Windows\CurrentVersion\Policies\system]
"NoDispBackgroundPage"=dword:00000000

[HKEY_LOCAL_MACHINE\Software\Microsoft\Windows\CurrentVersion\Policies\system]
"NoDispBackgroundPage"=dword:00000000


Disble Desktop tab:
Type following text in notepad or copy-paste it and save it with .reg extension. Then simply run/merge it. It will Disable Desktop tab in Display Properties window.

Windows Registry Editor Version 5.00

[HKEY_CURRENT_USER\Software\Microsoft\Windows\CurrentVersion\Policies\system]
"NoDispBackgroundPage"=dword:00000001

[HKEY_LOCAL_MACHINE\Software\Microsoft\Windows\CurrentVersion\Policies\system]
"NoDispBackgroundPage"=dword:00000001


Enable Screen Saver tab:

Type following text in notepad or copy-paste it and save it with .reg extension. Then simply run/merge it. It will Enable Screen Saver tab in Display Properties window.

Windows Registry Editor Version 5.00

[HKEY_CURRENT_USER\Software\Microsoft\Windows\CurrentVersion\Policies\system]
"NoDispScrSavPage"=dword:00000000

[HKEY_LOCAL_MACHINE\Software\Microsoft\Windows\CurrentVersion\Policies\system]
"NoDispScrSavPage"=dword:00000000


Disable Screen Saver tab:
Type following text in notepad or copy-paste it and save it with .reg extension. Then simply run/merge it. It will Disable Screen Saver tab in Display Properties window.

Windows Registry Editor Version 5.00

[HKEY_CURRENT_USER\Software\Microsoft\Windows\CurrentVersion\Policies\system]
"NoDispScrSavPage"=dword:00000001

[HKEY_LOCAL_MACHINE\Software\Microsoft\Windows\CurrentVersion\Policies\system]
"NoDispScrSavPage"=dword:00000001


Enable Settings tab:

Type following text in notepad or copy-paste it and save it with .reg extension. Then simply run/merge it. It will Enable Settings tab in Display Properties window.

Windows Registry Editor Version 5.00

[HKEY_CURRENT_USER\Software\Microsoft\Windows\CurrentVersion\Policies\system]
"NoDispSettingsPage"=dword:00000000

[HKEY_LOCAL_MACHINE\Software\Microsoft\Windows\CurrentVersion\Policies\system]
"NoDispSettingsPage"=dword:00000000


Disble Settings tab:
Type following text in notepad or copy-paste it and save it with .reg extension. Then simply run/merge it. It will Disable Settings tab in Display Properties window.

Windows Registry Editor Version 5.00

[HKEY_CURRENT_USER\Software\Microsoft\Windows\CurrentVersion\Policies\system]
"NoDispSettingsPage"=dword:00000001

[HKEY_LOCAL_MACHINE\Software\Microsoft\Windows\CurrentVersion\Policies\system]
"NoDispSettingsPage"=dword:00000001


.
July 25, 2008

Restore Recycle Bin


I posted an article on Recycle Bin-Windows XP on dated 20th November, 2007. People appreciated this article but they asked me how to enable/disable Recycle Bin in Windows XP. I got question regarding Restore disabled Recycle Bin in Windows XP. I forgot to write on this issue. Now, here I am for how to Restore Recycle Bin in Windows XP.

As usual it is just Registry trick. You can do yourself with following details.


Recycle Bin Enable:
Type following text in notepad or copy-paste it. Then run/merge it. It will Enable Recycle Bin.

Windows Registry Editor Version 5.00

[HKEY_CURRENT_USER\Software\Microsoft\Windows\CurrentVersion\Explorer\HideDesktopIcons\NewStartPanel]
"{645FF040-5081-101B-9F08-00AA002F954E}"=dword:00000000


Recycle Bin Disable:
Type following text in notepad or copy-paste it. Then run/merge it. It will Disable Recycle Bin.

Windows Registry Editor Version 5.00

[HKEY_CURRENT_USER\Software\Microsoft\Windows\CurrentVersion\Explorer\HideDesktopIcons\NewStartPanel]
"{645FF040-5081-101B-9F08-00AA002F954E}"=dword:00000001


Note: This trick works with Windows Vista too. Please try this one with Windows Vista.
.

July 24, 2008

Third Party Uninstaller


I think everyone who installs software/application on regular basis might faced uninstall trouble with some software/application. Mostly all software/application have a file named uninstall.exe, from which you can uninstall that software/application in normal condition. But, sometimes you don't get uninstall.exe or don't find installed software/application in Add & Remove Programs options. In this situation it is hard to uninstall those kind of software/application. There is a software named 'Your Uninstaller' which gives you so many facility including uninstallation facility of this kind of software/application. It is official brand software of UR Software, Inc. Please see following screen shot of 'Your Uninstaller' software.


You can download it from following link. It has huge inbuilt facilities. It also adds in your context menu so you can uninstall any software/application with use of just right click. It has following inbuilt features.

Features:
  • Completely remove any application installed.
  • Deep scan of registry and entire disk for unused registry entries and files.
  • Remove programs that could not be removed by Add/Remove Program.
  • Uninstall screen savers.
  • Remove internet surfing traces.
  • Backup and restore registry.
  • Registration key management.
  • Built-in Disk Cleaner helps you find and remove unnecessary files on your disk to save space and make computer faster!
  • Built-in IE Context Menu Cleaner, cleans the context menu of Internet Explorer.
  • Built-in Startup Manager, take full control of Window startups.
  • Fix invalid desktop shortcuts and start menu shortcuts.
  • Get the applications detail info even if it hide itself in deep directory, especially useful for finding out "Spy" applications.
  • Backup/restore installed-applications information.
  • Uninstall with SINGLE drag-drop! Just drop a file on Your Uninstaller! icon on the desktop to see what happens!
  • List installed applications with appropriate icons(same as you see in the Start Menu), you can easily find the application you want to uninstall.
  • Powerful search feature allows you quickly find the program you are about to uninstall.
  • Automatic detection of invalid installations and removing them with one click.
  • Force removal of uninstall related entries in the registry.
  • Lighting speed at startup, 5-10 times faster than Add/Remove Program of Windows XP

.

July 13, 2008

Hard Disk Partition

I posted an article on NTFS v/s FAT file system on July 08, 2007. Recently, I have noticed bad habit of Partitioning of Hard Disk. I found that people want more space on Data Partition instead of Main/OS Partition(e.g. once have 80 GB of HDD and make C = 20 GB, D=20 GB, E=20 GB, F=20 GB). The people cannot understand that C: is Primary/Logical Partition which needs more space than other partitions. Even, technical people don't have good practice regarding Partition. Thats why I need to write this article on Hard Disk Partition.

Disk Partition: It is nothing but separation/division of a single Hard Disk. There are Primary(logical) and Extended Partitions which contains NTFS or FAT file system.

Purpose for Partitioning:
  • Separate area for Operating system.
  • Separate area for Data.
  • Multi booting operating system.
  • Protect data when system crash.

Suggestion on Partitioning:
  • Always use NTFS file system for partition.
  • Always allocate more than 50% disk space to your logical partion.(I always create only 2 partitions per hard disk of 60:40 or 70:30 disk space ratio)
  • Don't create so many partition. Use 2 or 3 partition per HDD.
  • Always use compress drive on Data partition.
  • Change default file save option so each and every file of your system may save on data partition.
.

July 01, 2008

HP Scanjet 2400 Trouble


I faced trouble with HP 1000 series Laserjet printer before few years ago. That printer automatically lost its driver which installed by bundle packed driver CD. I tried and found a driver patch for HP 1000 series Laserjet printer from its own website. Then it worked perfect.


I wrote above story because, just few days ago I got same trouble regarding HP Scanjet 2400 series scanner on more than one computer systems. That Scanner automatically lost driver which installed by bundle packed driver CD as like as HP Printer. That driver CD created a shortcut named 'HP Director'(Please refer following screen shot) on Desktop of machine which didn't work after successfully installation. The 'HP Director' is so important for specialize scan like documents, and create a pdf format. After multiple tried I found driver patch from HP website. You can download same from following link.


.

June 18, 2008

Portable Application


I always carry my personalize applications with me on removable storage media like USB flash drive. Its so convenient to carry your favorite applications with you anywhere. The portable application is a computer program that you can carry with you on a portable device(like USB flash drive, portable hard drive, iPod etc.) and use on any Windows computer. It is just around 1 MB of size of Windows based application. It is absolutely FREE on following link.


Well, you just need to visit above link and download a portable app suite and install it on your favorite USB storage media. Once you install it then you will get a portable app utility(please check following screen shot). Now you can install other portable applications with help of portable app suite which you installed on your USB storage media. There are so many portable applications ready to carry.


What can you carry?
  • Web browser with all your favorite bookmarks
  • Calendar with all your appointments
  • Email client with all your contacts and settings
  • Messenger and your buddy list
  • Office suite along with your documents and presentations
  • Antivirus program and other computer utilities
(1) Download Portable Firefox


(2) Download Portable Mozilla Thunderbird


(3) Download Sumatra Portable PDF


(4) Download Openoffice.org Portable


(5) Download CalmWin Portable Antivirus


And many more Portable Applications available on above website. You're just a click far away from these kind of cool applications. So, what are you waiting for just visit following link and download your favorite Portable Application.


.

June 08, 2008

Add-Remove Programs Enable-Disable


Add or Remove Programs is the most important options for computer system. You can reach it through Start>Settings>Control Panel or Start>Run>type 'appwiz.cpl'. It has following inbuilt options.

(1) Change or Remove Programs
(2) Add New Programs
(3) Add/Remove Windows Components


The system Administrators may disable it for security reason like whole Control Panel. Few malicious software are also capable to edit Registry and make Add or Remove Programs disable which displays following error message(check screen shot).


You can also Enable/Disable the Add or Remove Programs in Control Panel settings with following steps.

Disable Add or Remove Programs:
Type following text in notepad or copy-paste it and run/merge it. It will Disable Control Panel.

Windows Registry Editor Version 5.00

[HKEY_CURRENT_USER\SOFTWARE\Microsoft\Windows\ CurrentVersion\policies\Uninstall]
"NoAddRemovePrograms"=dword:00000001


[HKEY_LOCAL_MACHINE\SOFTWARE\Microsoft\Windows\ CurrentVersion\policies\Uninstall]
"NoAddRemovePrograms"=dword:00000001


Enable Add or Remove Programs:
Type following text in notepad or copy-paste it and run/merge it. It will Enable Control Panel.

Windows Registry Editor Version 5.00

[HKEY_CURRENT_USER\SOFTWARE\Microsoft\Windows\ CurrentVersion\policies\Uninstall]
"NoAddRemovePrograms"=
dword:00000000

[HKEY_LOCAL_MACHINE\SOFTWARE\Microsoft\Windows\ CurrentVersion\policies\Uninstall]
"NoAddRemovePrograms"=dword:00000000

June 05, 2008

Unwanted Malicious Script

Before few months ago, I got a call regarding Internet trouble. They had troubled opening Internet. They could easily access first page of any website but they couldn't reach second pages or other links of visited website. I checked everywhere and found few viruses and deleted them. But, after then system couldn't let me access Internet. Suddenly, I found installed malicious script on that machine with Yahoo! logo. (Please check following screen shot)


I removed that malicious script from add/remove program options. Restart that machine and it started working normally. They used Yahoo messenger and accept/invite people to share file/web cam. Thus they got said malicious script.

Countermeasures:
(1) Do not accept / invite any one for photo/file sharing or web cam whom you really don't know because it establishes direct connection.
(2) Be careful in Yahoo chat rooms because there are so many fake id users whom will inject any malicious script forcefully via direct connection as per No(1)
(3) Don't click any URL shown in Yahoo chat room's window or your buddy's chat window.
(4) If possible create a fake id for chatting other than your email id.
(5) Always use strong password for security.
(6) Install a good anti virus software and update it on regular basis.

.

May 15, 2008

Yahoo Messenger Ad Killer

There are so many people use Yahoo messenger with chat rooms. Mostly people go to Yahoo chat rooms and find chat buddy. But more boring part is Ad which stay at bottom part of chat rooms' windows. Please see following screen shot. I found its nothing just registry settings in your system which allow Yahoo chat rooms to display Ad. Even you can edit/modify it with Registry Editor.

(1) No Add or Blank:
If you don't want any Ad on Yahoo chat rooms then just download following ready to use registry merger file and install it on your system.


(2) My Blog Ad:
If you want to display my website's URL on Yahoo chat rooms then just download following ready to use registry merger file and install it on your system.


(3) Restore Default:
If you want to restore default settings as it was then just download following ready to use registry merger file and install it on your system.

May 06, 2008

Desktop Orientation


Please see above screen shot of Normal Desktop Orientation. I got few query regarding Desktop Orientation which changed accidentally. It is so easy option. You can yourself to check it with help of Ctrl+Alt+any arrow keys. See following screen shot of changed Desktop Orientation.


You just need to use require combination to change Desktop Orientation. Please refer following details of arrow key combination.